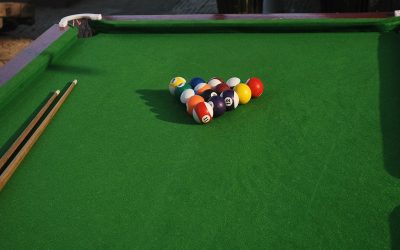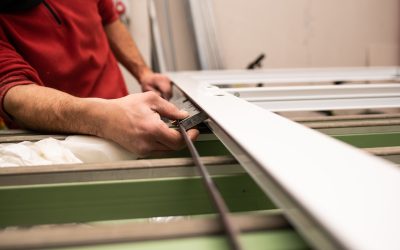
There’s nothing quite like the thrill of bringing home a pool table for your family game room or personal retreat. From imagining friendly tournaments with friends to envisioning hours of practice to hone your skills, a pool table is more than just a piece of furniture—it’s an investment in fun and entertainment. However, to make the most of this exciting addition, proper installation is key. A well-installed pool table ensures a seamless playing surface for accurate gameplay and helps maintain its structural integrity for years to come. Whether you’re considering a DIY approach or leaning towards professional assistance, the installation process can make all the difference.
Understanding a Pool Table’s Components
Slate Surface
The slate surface is the heart of any pool table and is crucial for ensuring even and fair gameplay. Slate provides a perfectly flat and smooth playing field, allowing balls to roll consistently without deviation. Its durability and weight make it ideal for maintaining balance and precision. However, installing the slate requires meticulous positioning and alignment to prevent uneven gameplay. Even the slightest misalignment can affect the roll of the ball, making professional installation a worthwhile investment.
Frame and Legs
The frame and legs form the backbone of the pool table, providing essential structural integrity and stability. Built to withstand the weight of the slate and the rigours of play, these components ensure the table remains level and sturdy, even over time. A robust frame, often made from solid wood or composite materials, is key to durability, while the legs must be positioned correctly to maintain balance and prevent wobbling during intense games.
Felt Covering
The felt covering plays a significant role in the performance of a pool table by influencing ball speed, accuracy, and overall gameplay. Made from a blend of wool and nylon, high-quality felt ensures smooth ball movement and consistent performance. It also protects the slate surface underneath from wear and tear. Proper maintenance, including regular cleaning and avoiding spills, helps preserve the felt, keeping the table in optimal condition for precision gameplay.
Pockets and Rails
Pockets and rails are essential components that enhance gameplay and functionality. The pockets are designed to catch and hold the balls after a successful shot, while the rails—equipped with cushions—ensure proper ball bounce during gameplay. High-quality rails provide consistent rebound angles, which are critical for skilled players aiming for strategic shots. Together, these features complete the pool table’s design and contribute to an enjoyable playing experience.

DIY Pool Table Installation
Tools and Equipment Needed
- Level
- Wrenches
- Staple gun
- Measuring tape
- Shims
Step by Step DIY Installation Guide
Prepare the Room
Ensure the space chosen for your pool table is adequate and allows for free movement around the table. Verify that the floor is level to provide a stable foundation for the table.
Assemble the Frame
Begin by securely attaching the legs and supports as per the manufacturer’s instructions. Double-check all screws and bolts to ensure the frame is sturdy.
Position the Slate
Carefully place the slate pieces onto the frame, ensuring they are properly aligned. Handle the slate delicately as it is heavy and can crack if mishandled.
Level the Table
Use a level tool to check the table’s balance. Adjust accordingly with shims to ensure evenness across the entire surface. This step is essential for accurate gameplay.
Install the Felt
Stretch the felt neatly over the slate, ensuring there are no wrinkles. Secure it using a staple gun, paying close attention to avoid loose or uneven areas.
Attach Rails and Pockets
Properly align the rails and pockets with the table frame and carefully fasten them in place. Tighten all screws to ensure they are secure.
Final Adjustments
Perform a final check on the table’s stability and make any necessary tweaks. Test the table by rolling a ball to confirm proper levelling and readiness for play.
Challenges and Considerations
Weight and Handling of Heavy Materials
One of the primary challenges when setting up a pool table is managing the weight of materials like slate. Slate is extremely heavy and requires careful handling to prevent damage to both the slate itself and the flooring underneath. Additionally, improper handling can lead to injury, emphasising the need for adequate manpower and appropriate equipment.
Achieving Precise Levelling
Precise levelling is critical to ensuring optimal gameplay quality. Even a slight imbalance can cause balls to roll inaccurately, leading to an uneven playing experience. Achieving this precision often demands patience, a keen eye, and the use of high-quality tools like a spirit level to verify alignment.
Expertise in Felt Installation
Installing the felt correctly is a meticulous process that requires skill and precision. Wrinkles, bubbles, or loose areas in the felt can disrupt the ball’s travel and negatively impact the game. Using the right stretching techniques and securing the felt evenly across the surface is essential to achieve a smooth, flawless finish.

Professional Installation
Benefits of Hiring Experts
Hiring professional installers guarantees accurate levelling and alignment of your pool table, ensuring optimal playability. Experts come equipped with the proper tools and possess the experience needed to handle the installation with precision. This not only saves you valuable time but also eliminates the risk of potential damage to the table or components during the process.
What to Expect from Professionals
Disassembly and Transportation
If your pool table needs to be moved before installation, professional installers can manage the disassembly and transportation process with utmost care. Disassembling a pool table involves carefully removing the pockets, rails, felt, and slate to prevent any damage. Professionals use specialised equipment and techniques to safely transport these heavy and delicate components to the new location, ensuring everything arrives in perfect condition.
Setup Process
The installation process begins with frame assembly and alignment. Experts ensure the frame is securely constructed and meticulously levelled to provide a stable base. After the frame is properly aligned, the slate is placed and seams are sealed to create a smooth and even playing surface. Finally, the felt is carefully applied and stretched evenly across the slate, making sure there are no wrinkles or loose areas. This level of precision ensures an exceptional playing experience and prolongs the lifespan of your pool table.
Time Estimate
For slate tables, the assembly process typically takes between 2 to 4 hours due to the meticulous attention required for aligning the slate and sealing the seams. On the other hand, MDF tables are generally quicker to assemble, with an estimated time of 1 to 2 hours, as they do not require the same level of precision handling as slate tables.
Cost Comparison
DIY Costs
When assembling a pool table yourself, the initial investment in tools can be significant, especially if starting from scratch. Essential tools such as a level, shims, and a staple gun, among others, may need to be purchased upfront. Beyond this, there are potential hidden costs to consider. Mistakes during assembly, such as improper levelling or accidental damage to the felt, can lead to additional repair or replacement expenses. These unforeseen costs can quickly add up, making it crucial to approach the process with care and preparation.
Professional Installation Costs
The typical average cost of hiring experts for pool table installation can vary significantly depending on the type and complexity of the table. For standard home pool tables, the installation cost usually ranges from 150AED to 300AED. However, more intricate or professional-grade tables, such as those with a three-piece slate or custom designs, may see costs exceeding 500AED. These variations highlight the importance of considering the specific requirements of your table when budgeting for professional installation services.

Making the Right Choice
Key Factors to Consider
Skill Level and Experience
Assessing your skill level and prior experience with heavy assembly tasks is crucial when deciding whether to attempt the installation yourself or hire professionals. Pool table assembly often requires precision and expertise, particularly if the table includes components like slate pieces or intricate levelling systems. For those with limited experience, enlisting professional services may ensure a more accurate and stable installation.
Time Availability
The setup process for a pool table can be time-consuming, especially if it involves detailed adjustments or aligning multiple components. Consider your availability to dedicate sufficient time for the assembly. Rushing through the process can lead to mistakes that impact the table’s performance, underscoring the importance of planning accordingly.
Budget for Tools or Professional Fees
Budgeting is another critical aspect, as the costs can vary depending on your approach. If opting for self-assembly, you may need to purchase or rent specific tools for the job, which can add to the overall expense. Alternatively, hiring professional installers will incur service fees but often guarantees a seamless and efficient process, offering greater value for more complex setups.
Accessibility of Room
The room where the pool table will be placed plays a significant role in the installation process. Rooms with easy access and ample space simplify the setup, while tighter or challenging layouts may require more effort, time, and even additional tools or expertise. For complex setups, ensuring adequate space and accessibility is vital to avoid complications during installation.
Recommendations
DIY Tactics for Lighter Tables
If you have prior experience and access to the proper tools, setting up a lighter MDF pool table can be a manageable DIY project. Focus on carefully following the assembly instructions provided by the manufacturer, ensuring all components are securely fixed. Using a level to check the playing surface is crucial for optimal gameplay. Take your time during each step to avoid mistakes, and recruit an extra pair of hands if needed for stability during assembly.
Professional Installation for Heavier Tables
For heavier slate pool tables, or if precision and time are critical, opting for professional installation is highly recommended. Slate tables require meticulous levelling to ensure a flawless playing surface, which is best carried out by experts with specialised tools and experience. Professional services not only save you time and effort but also guarantee accuracy and a high-quality setup, preserving the table’s longevity and performance.


