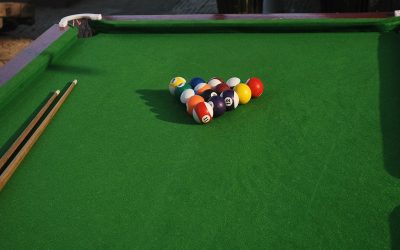

Restoring a pool table offers the perfect combination of practicality and charm, allowing you to elevate gameplay while reviving a timeless centrepiece for your home. Whether your table has been a cherished family heirloom or a faithful addition to your games room, a DIY restoration can breathe new life into it without the hefty cost of buying new.
Professional refelting alone typically costs a fraction of a full table replacement, and rolling up your sleeves for a weekend project saves even more. With just a few modest tools and a bit of effort, you can turn back the clock on your pool table, preserving its legacy while enjoying a stunning upgrade in both aesthetics and playability.
Initial Inspection: Diagnose Before You Disassemble
Conducting a Thorough Inspection
Felt
Start by carefully examining the felt for any signs of wear and tear. Look for tears, burns, bald spots, or areas of looseness that could affect gameplay. Also, take note of how the cloth is attached to the table — whether it has been stapled or glued — as this will influence your approach when replacing or repairing it.
Cushions
Next, test the cushion rebounds at multiple points along each rail. A proper cushion should provide a reliable and lively rebound when struck. If you notice any hardened or dead spots, it’s a sign that the rail rubber has deteriorated and needs replacing. Be aware that most tables use standard K-55 or K-66 rubber profiles, so confirm compatibility when sourcing replacements.
Pockets
Inspect the pockets thoroughly, focusing on the condition of the leather or plastic materials. Look for cracks, tears, or other signs of degradation. Additionally, assess any decorative tassels or liners, as these often experience common wear. Finally, ensure all fasteners holding the pockets in place are tight and secure.
Wood and Frame
The wood and frame components should be checked for scratches, peeling veneer, or damaged finishes. Verify the stability of the legs and frame, looking for any wobbling that could impact play. Use a carpenter’s level to confirm that the slate is perfectly even, as uneven surfaces may require adjustments or repairs.
Quick Decision Tree
Based on your findings, decide whether your table simply needs a cosmetic refresh or a more extensive refurbishment. Minor wear and aesthetic issues can often be addressed with targeted fixes, while structural or functional damages might demand a full-scale restoration to restore optimal performance and appearance.
Disassembly: Strip Down Safely and Systematically
Removing Pockets, Rails, and Bumpers
Start by carefully removing the pockets, rails, and bumpers in the correct sequence. Use labelled bags, sticky notes, or small containers to document the placement of bolts, screws, and other fasteners, ensuring easy reassembly later. Take photos during the process to maintain a clear reference for the order of cushions, rails, and components.
Detaching the Old Felt
Next, detach the old felt from both the slate and the rails. Pay attention to any feather strips in place, as these are important for securing the felt during reinstallation. Handle the felt gently to avoid excessive dust or debris spreading during removal.
Protecting the Slate and Edges
When handling the slate, make sure it is supported and protected to prevent damage to the edges or corners. Use padded surfaces or blankets to cushion the slate and secure it in a safe location during storage. Similarly, store fasteners and small parts such as screws, bolts, and clips in organised containers or bags to avoid loss and confusion during reassembly.
Refelting: Smooth, Taut, and True
Preparing the Slate for Refelting
Before starting the refelting process, it is essential to properly prepare the slate surface. Begin by cleaning the slate thoroughly to remove any dust, dirt, or debris. Next, carefully remove any old staples or adhesive residue left from the previous cloth. Ensure that the slate surface is completely dust-free and level, as any imperfections can interfere with the quality of play once the table is refelted.
Installing the Bed Cloth
When installing the new bed cloth, proper alignment is crucial to achieving a smooth and professional finish. Position the cloth over the slate, aligning it carefully, and stretch it evenly to avoid any wrinkles or sagging. Secure the cloth by stapling or adhering it, starting from the centre and working outwards towards the edges. This method ensures an even, taut surface, improving both the appearance and playability of the table.
Refelting the Rails
For the rails, precision is key. Cut the rail cloth accurately to match the dimensions of each rail. Install the cloth using feather strips to hold it in place, and use a rubber mallet to ensure a snug, secure fit. This ensures that the rails maintain proper tension and provide consistent ball response during gameplay.
Understanding Costs and Considerations
Refelting costs can vary significantly based on whether you choose a DIY approach or hire a professional. DIY materials typically cost a few hundred dollars, making it a more budget-friendly option for those confident in their skills. Professional refelting, on the other hand, often costs several hundred dollars but guarantees a high-quality finish and saves time. Consider the balance between cost, time investment, and desired quality before deciding which approach to take.
Choosing the Right Cloth
The type of cloth you choose can greatly impact play speed and budget. Woollen cloth is a popular, affordable option and is ideal for casual play, offering a slower ball speed. For advanced players seeking faster game speeds, worsted cloth is the preferred choice due to its smoother weave, but it is typically more expensive. Choose a cloth type that aligns with your playstyle, preferences, and budget.
Bumper and Rail Refurbishment: Restore Rebound
Inspect the cushion rubber for any signs of hardness, cracks, or inconsistent bounce. These issues can significantly affect gameplay, so a thorough evaluation is essential. Remove the old rubber and adhesive carefully to prevent damage to the rail surface. Once the surface is clean and smooth, install new cushion rubbers, such as K-55 or K-66 profile cushions, using the appropriate adhesive. Ensure the cushions are properly aligned and allow adequate curing time for optimal performance. After the rubber replacement, re-cloth the rails with precision to achieve a professional finish and ensure consistent rebound across the table.
Wood Refinishing: From Tired to Timeless
Strip and Prepare the Surface
Begin by stripping the old finish from the wood, or apply primer if you plan to paint. Use a chemical stripper or sandpaper, ensuring the surface is entirely free of residue or imperfections. Inspect the wood for any damaged veneer; repair it using wood glue, spackle, or decorative moulding as necessary. Once the repairs are complete, sand the surface smoothly to create an even base for the new finish.
Staining or Painting
If staining the wood, apply an even coat of stain using a clean cloth or brush, taking care to work with the grain. Immediately wipe away any excess stain to prevent blotchy areas. Alternatively, for a quicker makeover, opt for chalk paint, which requires minimal prep work and provides excellent coverage with a matte finish. Both techniques offer distinct styles—choose based on the desired aesthetic.
Sealing and Finishing Touches
To protect the woodwork, seal the finish with lacquer, varnish, or a durable topcoat that enhances longevity and resists wear. For an added touch of elegance, consider incorporating subtle colour accents that harmonise with the table’s felt and the surrounding room décor. This final step ensures a polished and customised look that complements the overall design.
Level and Stabilise: Precision for Perfect Play
Begin by tightening all frame bolts and leg fasteners to ensure the structural integrity of the table. The connections should be firm yet not overtightened, avoiding any potential damage to the wood or fittings. Next, use a spirit or carpenter’s level to check the slate’s alignment. Place the level across the slate in multiple directions—front to back, side to side, and diagonally—to ensure a precise balance. If discrepancies are found, adjust the leg levellers or carefully shim the legs until the slate is perfectly true. Finally, perform a roll-test by gently rolling balls from various points on the table. This step allows you to verify levelness and cushion consistency, making precise adjustments where necessary to achieve smooth and even playability.
Reassembly: Finish Strong
Reattaching Rails and Pockets
Begin by reattaching the rails and pockets in the reverse order of their removal. Carefully align each rail to its corresponding position and secure them using the original bolts. When tightening the bolts, ensure to apply even torque across all connections to prevent any warping or misalignment of the rails. Double-check that each pocket is securely fastened and properly aligned with the table openings.
Installing New Dots and Smoothing the Cloth
If you’re updating the table, install new aiming dots or other markings in their designated positions. Use precise measurements to maintain accuracy for gameplay. Next, perform a final smoothing of the cloth, ensuring that it is evenly stretched and free from wrinkles or creases. Once smoothed, trim any excess cloth to achieve a clean and professional finish around the edges.
Final Quality Control
To conclude the reassembly process, conduct a thorough quality control (QC) check. Verify the fit and stability of each pocket, ensuring they align seamlessly with the table openings. Assess rail alignment and check for any gaps or unevenness. Test the cloth tension to confirm it is uniformly taut, and perform a final level check to guarantee the table remains perfectly balanced. Address any inconsistencies immediately to achieve optimal playability and a flawless finish.
Get Professional Pool Table Refurbishment Services with Interpool
Looking to revitalise your pool table for optimal performance and elegance? Trust the experts at Interpool for professional pool table refurbishment services. Our comprehensive service includes:
- Pool Table Polishing
Restore the shine and finish of your table to make it look as good as new.
- Cushion Rubber Replacement and Installation
Ensure perfect bounce and gameplay with high-quality cushion replacements.
- Pocket Replacement and Fixing
Replace worn-out pockets and fix them securely for a seamless playing experience.
Contact Interpool today and give your pool table the care and attention it deserves!